Ad Hoc Report Wizard
![]()
|
|
Estudiante Student Tracking Software Ad Hoc Report Wizard |
|
|
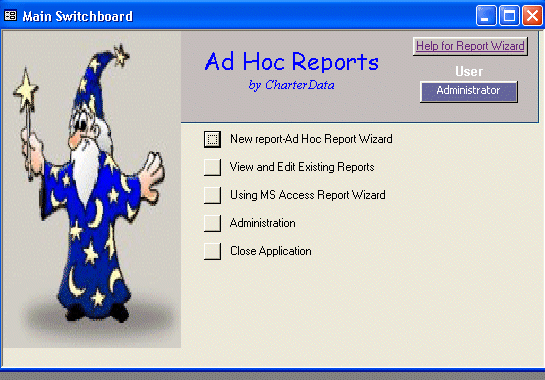 |
Ad Hoc Report opens a new application
(not internal to Estudiante) with the main menu on the left.
The menu options are described below:
|
 |
Ad Hoc Report
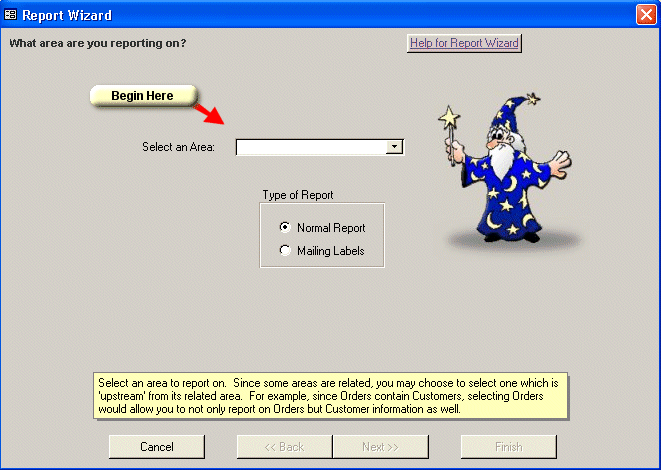
Wizard Step-by-Step The basic Wizard consists of 5 easy-to-follow steps. The Wizard begins by asking the user to choose a record source. This will be queries that are defined to present you with all data relating to specific type of student data e.g. student demographics, memberships, attendance or schedules. . You may also choose whether to create a normal report or mailing labels. |
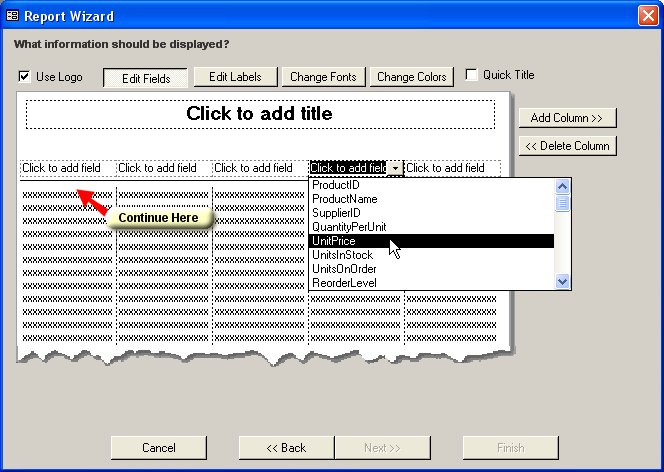 |
The next step is where one will choose what fields they wish the report to contain. After choosing a field, the Wizard will automatically guess the column width based on sampling a certain number of records from the given field in the recordset. The user may also drag and drop the column widths to a desired width or double-click for an automatic column resize. Up to 14 columns of data may be displayed. Blank columns are also allowed. |
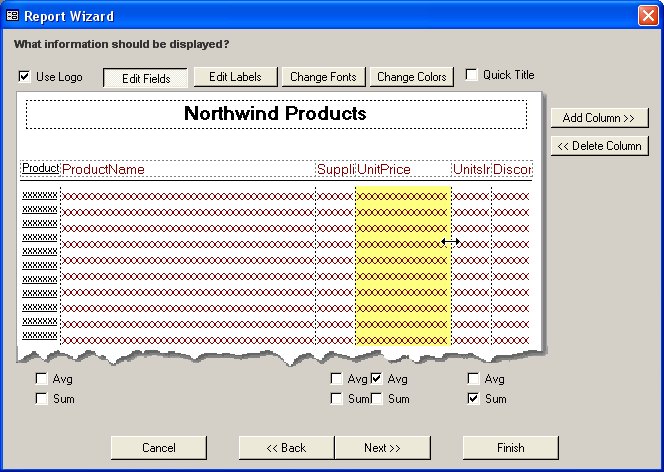 |
If numerical fields are chosen, the Wizard will present options to sum and average the values for the report (and group levels if specified). Column header values may also be specified and the Wizard will automatically adjust the header height if headers require two rows to fit. One may also choose different formats such as font types and column colors. |
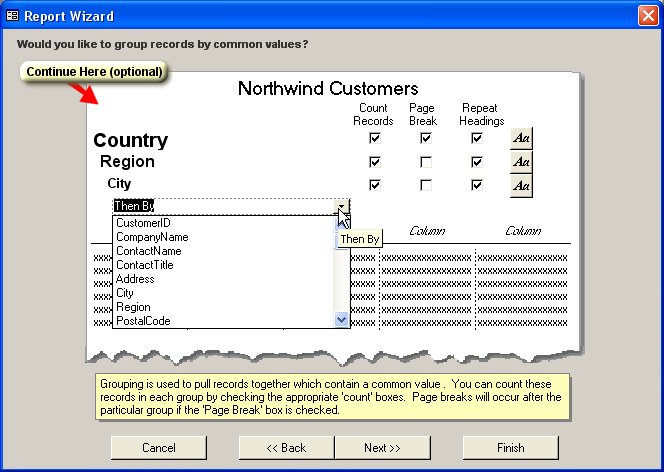 |
Up to four group levels may be designated to allow the user to pull together rows of common values. Counting records for each group, page breaks between groups and repeating header information for each group are also options. An example of grouping would be rosters based on grouping by course. Group text may also be formatted and will automatically be resized if the user so chooses. |
 |
Filtering and sorting records can be done in an unlimited number of ways. A Quick Filtering option will allow the user to avoid storing filter information with the report and be prompted each time the report is opened. An example of Quick Filtering might be reporting absences between two dates where the user enters the start and end date each time the report is run.Even filter information that no longer exists in the database can be recalled when the user edits a report that was created when the data existed so that the Wizard will look exactly as it were when the report was created. |
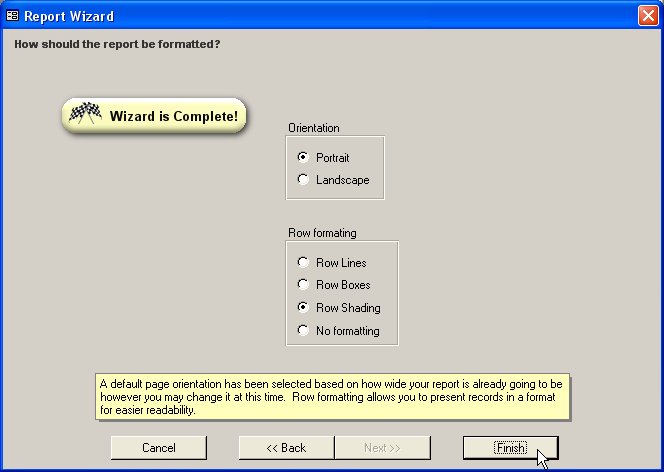 |
The final step allows the user to override the default page orientation - which is automatically guessed based on how wide the columns and fonts are currently. The user may also choose how to display and format the rows. For example, rows may be alternating shaded, boxed or lined. |
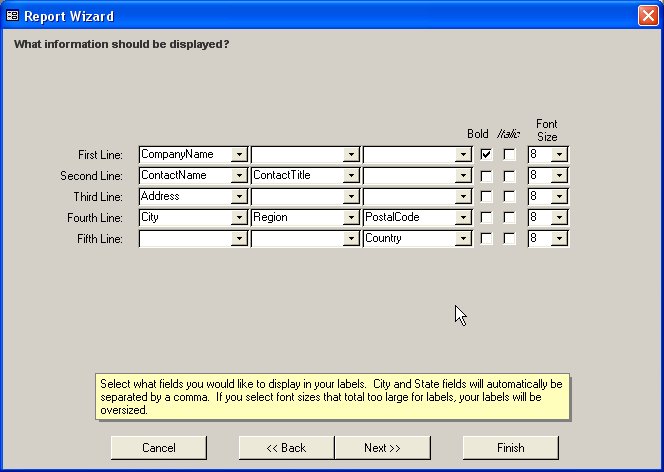 |
If the user has chosen to create mailing labels, the Wizard will instead take them to the mail label step whereby the user selects what fields to display on the label. |
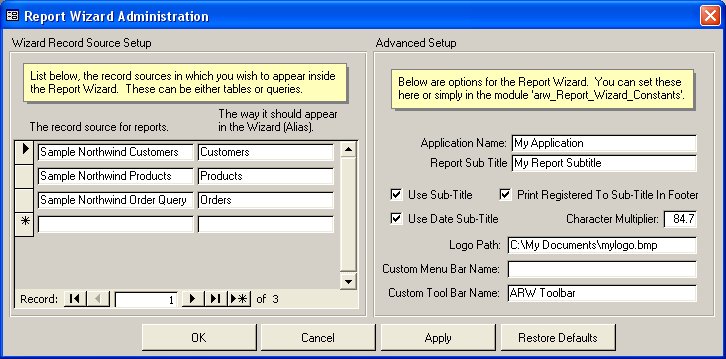 |
The administration menu is where the developer (or end user) can specify what record sources the Wizard will allow (tables and queries) and may also give them alias names (such as "qry_Order_Query" to "Orders"). Other constants may also be set such as the report footer information (date, registration info, sub-title, custom menu bar and toolbar, logo path, etc.) Initially the administration menu will be available only to the Developer. |
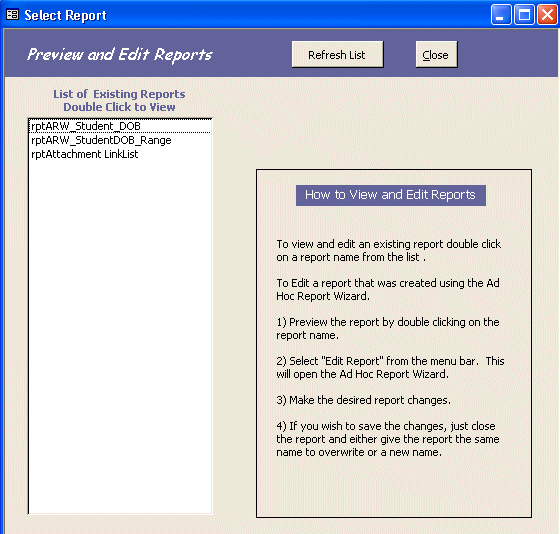 |
Editing a report that was created using the Ad Hoc Report Wizard |
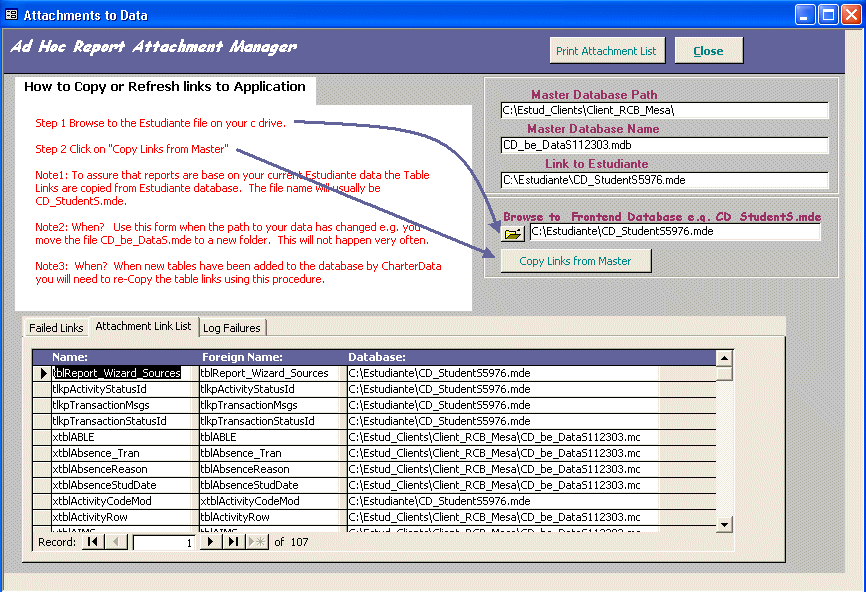 |
Attachment Manager This step is used to synchronize tables/data between Estudiante and Ad Hoc Report. This is required only when the tables in Estudiante have been changed by Charter Data or if you have move the location of the Estudiante application. |